|
|
|
|
A reseller can add as many users (webadmins) as required as long as the quota allows. Once a webadmin user has been added, the reseller can then create a new domain for that user, as required.
To add a user:
Click the User Manager menu under the General section.
Click the Add User submenu.
Provide the following information as required and press the Add User button at the end:
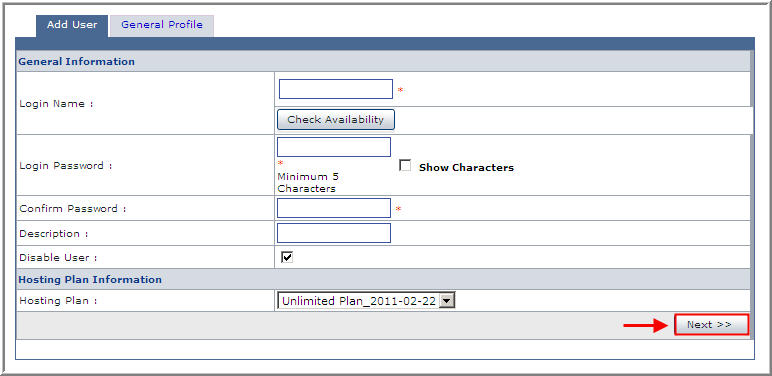
General Information
This is the general information related to the webadmin to be added. This includes introductory data about the webadmin.
Login Name:
This is the login name of the webadmin. This will be used to access the panel.
Login Password:
The webadmin has to provide a password to access the panel. The login name is visible, but the password is not visible. It is a set of secret characters. It is recommended that password should consist of a combination of letters and numbers.
Confirm Password:
Here re-type the password, provided in the Login Password field.
Description:
This is any extra information that is to be added about webadmin in order to make it more descriptive.
Disable User:
To disable the account of this user tick this check box. This is normally done in case the reseller has pending invoices or has not paid any due payments.
Hosting Plan Information
This is information related to the hosting plan of the user to be added.
Hosting Plan:
Here you can select the plan for the user from the drop down menu.
Click Next to go to the next page.
General Profile
This is the profile information for the user. It has all the information related to the profile of the user and includes personal information like name, address, zip code etc.
First Name:
This is the first name of the webadmin to be added.
Last Name:
This is the last name of the webadmin to be added.
Email Address:
This is the email address of the webadmin to be added. This should be a valid email address as it is used for all the official email correspondence. Important announcements are sent on this address. Also the new password email is sent on this address.
Street Address 1:
This is the street address of the webadmin to be added.
Street Address 2:
This is optional second street address.
City:
Enter the city of the webadmin.
Country:
Select the country of the webadmin to be added from the drop down list.
Province/State:
Type the state or province of the webadmin.
ZIP/Postal Code:
Provide the ZIP/Postal code of the webadmin.
Phone Number:
Type the phone number of the webadmin.
Fax Number:
Type the fax number for the webadmin to be added. This entry is not mandatory.
National Identification Number:
Enter the National Identification number for the webadmin.
Company:
Provide name of the company of the webadmin to be added.
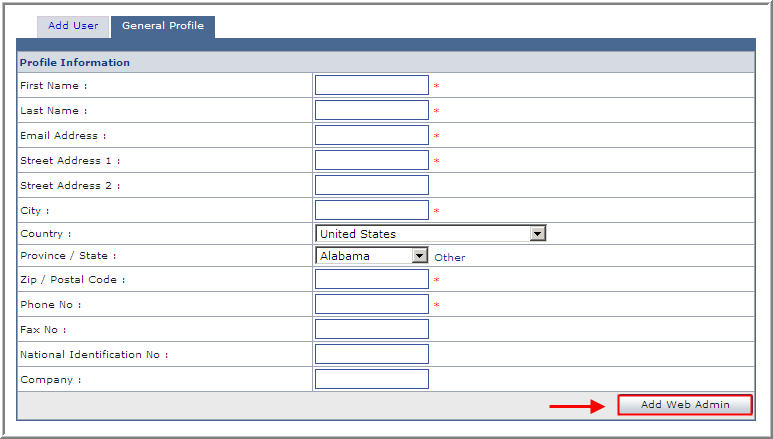
Click Add Web Admin to finish this procedure.
See Also:
![]()
|
© Hosting Controller 1998-2011. All Rights Reserved |
